Content
- Abstract
- Assignment 01 – Landscape
- Assignment 02 – Architecture
- School Day 01 – Time and Space
- School Day 02 – View Camera
- School Day 03 – IJmuiden
- School Day 04 – Photoshop
- School Day 05 – Four views on Architecture
- School Day 06 – Abstracts
- School Day 07 – View Camera II
- School Day 08 – Interiors
- School Day 09 – Project Day
- School Day 10 – Assessment
Abstract
This is a selection of the results generated during “Module 06 – Landscape & Architecture”.
Module Content:
Landscape & Architecture.
Module Teacher:
Ruben Schumacher.
Assignment 01 – Landscape
Description
Make a series (5–6) of landscape images depicting what, in your eyes, determines the quality of the landscape.
- Series of photos showing your vision on (landscape) photography.
- Show the photographic tradition (e.g., photographer/stye) you use.
- Choose a suitable presentation.
Plan
Perhaps as a slight deviation from the original assignment, I intend to photograph the contrast as well as the combination of village/city/industry skyline with the natural environment. Both as a positive and negative message: yes, we can well live within as well as preserve the natural environment, and no, we should not go further in claiming nature for roads, buildings, industry, etc.
- View point: shots taken from within the nature (preferably a true Natural Landscape or Nature Reserve), with a strip of water separating this piece of land from the unnatural environment.
- Locations:
- South of Amsterdam from the polder “De Ronde Hoep”.
- Kockengen as viewed over the meadows.
- Natural Landscape “Landtong Rozenburg”: view at the heay industry of the Rotterdam port area.
- Natural Landscape “Landtong Rozenburg”: view at Maassluis.
- IJmuiden: Corus Steel Plant seen from the nature in the Lock area.
- Amsterdam, Noorder IJ-polder: view at Amsterdam port area.
- Natural Landscape “Groot Koninkrijk”: view at Zwijndrecht and Dordrecht port areas.
- Natural Landscape “Beuningse Uiterwaarden”: View at Noordkanaalhaven.
- Reference photographers: Though I have found no photographers who have done panoramas at such a size, you could say I have taken Andreas Gursky as a reference point for highly detailed images. Two photographers I have found who have photographed (city) panoramas are Andrew Prokos (city panoramas) and, perhaps more appropriately, Rafael Rivera (aerial panoramas with a very high level of detail).
- Format: extremely large (long) panoramas of the sky lines.
- Presentation: Panorama strips printed on roll-paper.
Results
Update:
The panoramas are being exhibited at the building of the Fotovakschool
at the Nieuwe Spiegelstraat 10, Amsterdam. They are accompanied with a short
text, explaining the reasoning behind the images (Dutch only).
 Docks of the Port of Rotterdam as seen from Natural Landscape “Landtong Rozenburg” Print Size: ±291x34cm |
 Maassluis as seen from Natural Landscape “Landtong Rozenburg” Print Size: ±284x35cm |
 Docks of the Port of Amsterdam as seen from the “Noorder IJ-Polder” Print Size: ±278x34cm |
 Corus Steel plant as seen from the Locks Print Size: ±274x34cm |
 Zwijndrecht and Dordrecht harbour areas as seen from Natural Landscape “Groot Koninkrijk” Print Size: ±280x34cm |
 Noordkanaalhaven as seen from Natural Landscape “Beuningse Uiterwaarden” Print Size: ±199x35cm |
Assignment 02 – Architecture
Description
Use a series of photos to show your vision on what has been built in the Netherlands in the last centuries.- Series (6+) of photos showing your vision as well as your style of working.
- Research the history of architecture photography.
Plan
The human desire to conform to what “others” do and think can sometimes become overwhelming. At the Dutch “Vinex” locations, it becomes choking. Every attempt at originality is quickly suppressed by rows and blocks of the same single house, repeated over and over again, without a single trace of individuality added.
What makes these locations even more depressingly dull is the deadness. During the day, most houses are deserted as both husband and wife are at work, and their children are at the day-care centre. When they come home at night, people hurry from their cars to their living rooms. There are no parks, no trees, and the tiny gardens (if the houses even have one) are quickly paved over to make sure no green will ever sprout there.
Even brilliant architectural ideas cannot survive this drearyness, and soon dwindle to become another drab line of houses…
- Location: Vinex location Leidsche Rijn.
- Form: Dull, straight-on photos of houses in a multitude of streets. A bit like the Bechers photographed e.g., the framework houses (though I will shoot the houses with a different meaning altogether).
- Reference photographers: Bernd & Hilla Becher.
- Presentation: Booklet.
Results
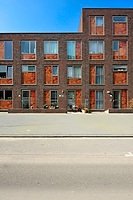 Parkzichtlaan |
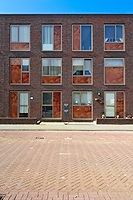 Kandinskystraat |
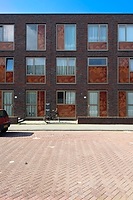 Marc Chagallstraat |
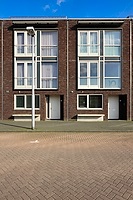 Musicalkade |
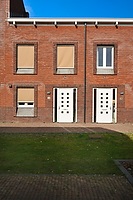 Boccacciopad |
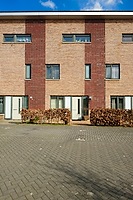 Paul Linckehof |
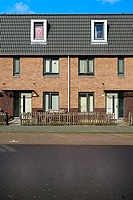 Edmund Eyslerstraat |
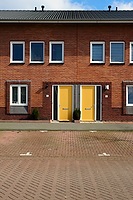 Hervéstraat |
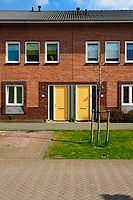 Richard Geneestraat |
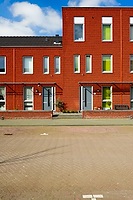 Joan Mirostraat |
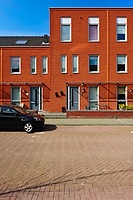 Paul Kleestraat |
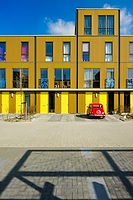 Renoirhof |
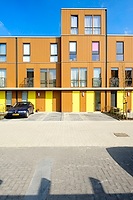 Georges Braquehof |
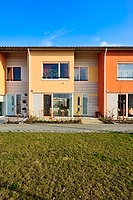 Jule Stynestraat |
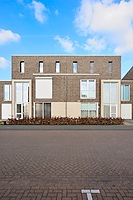 Frederik Loewestraat |
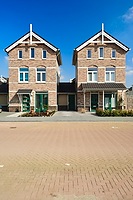 Paul Citroenstraat |
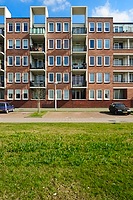 Edmond Audranstraat |
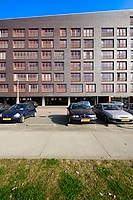 Musicallaan |
The result of the research into the history of (in my case Dutch) architecture photography can be found in this document (Dutch text).
School Day 01 – Time and Space
Description
Create a triptych of architectural photos depicting “Time and Space”.
Plan
On location (IJburg), I saw the concrete of an outside wall made look like it was a natural stone. This inspired me to look for building materials and compositions that could depict Time and Space, In the end I opted for:
- Sky and windows (the sky for the space, the windows (glass) as a material that is short-lived).
- Door and Brick (the door to enter other spaces, the metal and the bricks as medium-lived materials).
- Conrete wall, sculpted as natural stone (the stone as long-lived (permanent) material).
Results
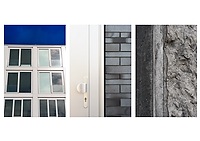 Triptych Time & Space |
School Day 02 – View Camera
Description
Take a Technical Camera and use that to take an architecture shot without any prespective distortion.
Plan
We decided to be a bit more creative and opted to create a Frank van der Salm-like photo where we used the ability of the TC to play with the focal plane to give the impression of a photo taken of a miniature instead of a real situation.
Results
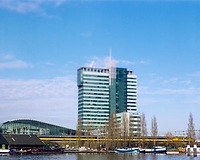 Piet Heijnkade from Oosterdok – Frank van der Salm-like Note: due to a processing error at the lab, the slides were destroyed. This is therefore a scan of the test polaroid. |
School Day 03 – IJmuiden
Description
Today we went to IJmuiden to shoot a series of landscape images using the water, dunes, and heavy industry as subject matter in a series (6–8 photos) on “the edge of the land”. All to be shot in mind with the fact that the final result is to be presented in B&W.
Plan
First get inspired by the environment, then think of a subject for a series and start shooting.
After looking at a number of huge concrete blocks, I just had to use those in my series. My first idea was to make a series of the different stages of the concrete making process (form sand and stone to concrete building blocks). A second idea was to make a series of pictures of concrete walls together with a detail-shot of the (concrete) building blocks used in that wall.
While I made shots for both ideas, the wall idea is what made it as the “selected” series.
Results
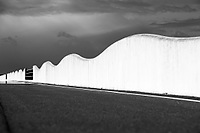 Wall |
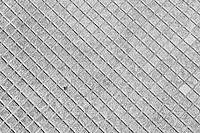 Concrete pavement |
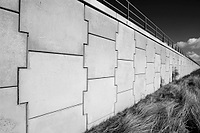 Wall |
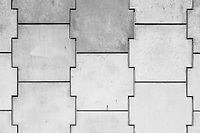 Concrete plates |
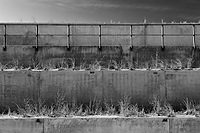 Wall |
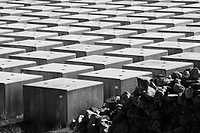 Concrete blocks |
School Day 04 – Photoshop
Description
Discussion on everyones progress on the module assignments as well as some advanced Photoshop B&W techniques. These techniques were used to finish the results of the IJmuiden series.
School Day 05 – Four views on Architecture
Description
Take four shots of a building, using a different view for each:
- An image for the Architect (focus on the form of the building).
- An image for the Government (focus on the function of the building).
- An image for a project developer (focus on the attractiveness of the building).
- An image for yourself, e.g., what you like about the building.
After researching each, choose one of the following buildings:
- SBS Offices
- World Trade Centre
- De Bazel (building Nederlandse Handel Maatschappij)
- Stopera
- Het Schip
- Silodam
Plan
While each building/site had its pros and cons, I eventually decided on “Het Schip” based on, amongst others:
- the site (the building is relatively free standing), and
- the architecture of the building itself (I normally like modern architecture better, so this would add to the challenge).
Results
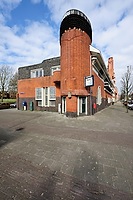 For the Government Simple picture showing one of the functions of the building: a museum. |
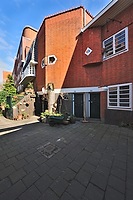
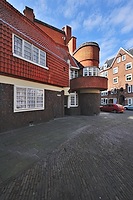 Amsterdamse School, “Het Schip” – For the Architect There are so many pieces of archtitecture (detail), I decided on en image not seen often of “Het Schip”; the back side with lots of different architectural ascpects. |
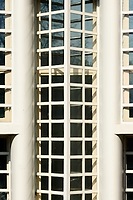
 Amsterdamse School, “Het Schip” – For the Project Developer For the Project Developer I chose to show the cosiness of (living in) the building. |
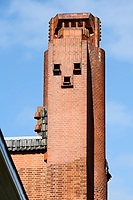
 Amsterdamse School, “Het Schip” – For Me Even though this building is not of modern architecture, there are still lots of things I like about it. This detail of a window is but one of them. |
 Amsterdamse School, “Het Schip” – For Me Alternative. |
School Day 06 – Abstracts
Description
Based on the discussion in-class on abstracts, go outside and take an abstract image.
Plan
I decided to try something I normaly try to prevent at all cost: to take unfocussed images. As it turns out, I quite like the results!
Results
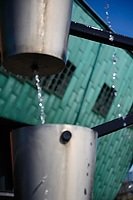 Water Wheel |
 Stairs |
 At the Beach |
 Cityscape |
 Scooter |
School Day 07 – View Camera II
Description
As the slides of the first View Camera excercise where lost, we took another shot at creating a Frank van der Salm-like photograph (which, this time, was the official assignment as well).Plan
Go to the top of the Nemo building and shoot as downwards as possible, to strengthen the “van der Salm effect”.Results
Sad but true: again the results were ruined, this time by light spilled on the slide, either when it was loaded, or when it was unloaded. Luckily we still have the polaroid created the second day.School Day 08 – Interiors
Description
Try capturing the new Fotovakschool building in a triptych.Plan
Be inspired by the new (still largely empty) building.Results
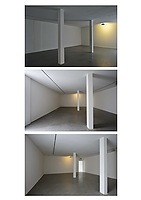 Emptyness |
School Day 09 – Project Day
Description
Day available for the final touches to the results for the assessment.School Day 10 – Assessment
My Own Learnings this Module
- Using (lack of) focus as a creative means.
- Creating extremely large panoramas.
Input
The following material was used as the basis of the Assessment:
- Results of all the assignments.
- My own learnings.
Results
- Study Points: 6
- Advise: None.
- Additional work required: None.


